Aubrey Violeta Gelpieryn
  • HOME
  • Portfolio
    • Print/Digital
    • TV
  • Resume
  • Blog
  • About

Desserts

Vegan Chocolate Chip Cookies

1/1/2017

0 Comments

 
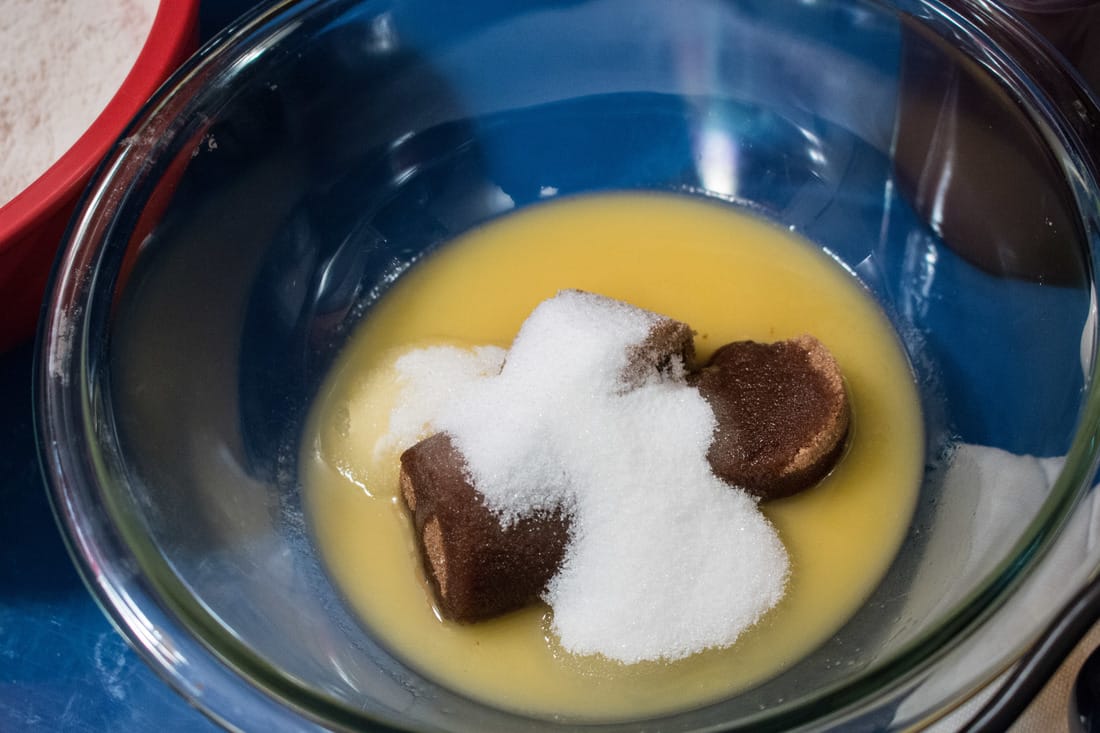
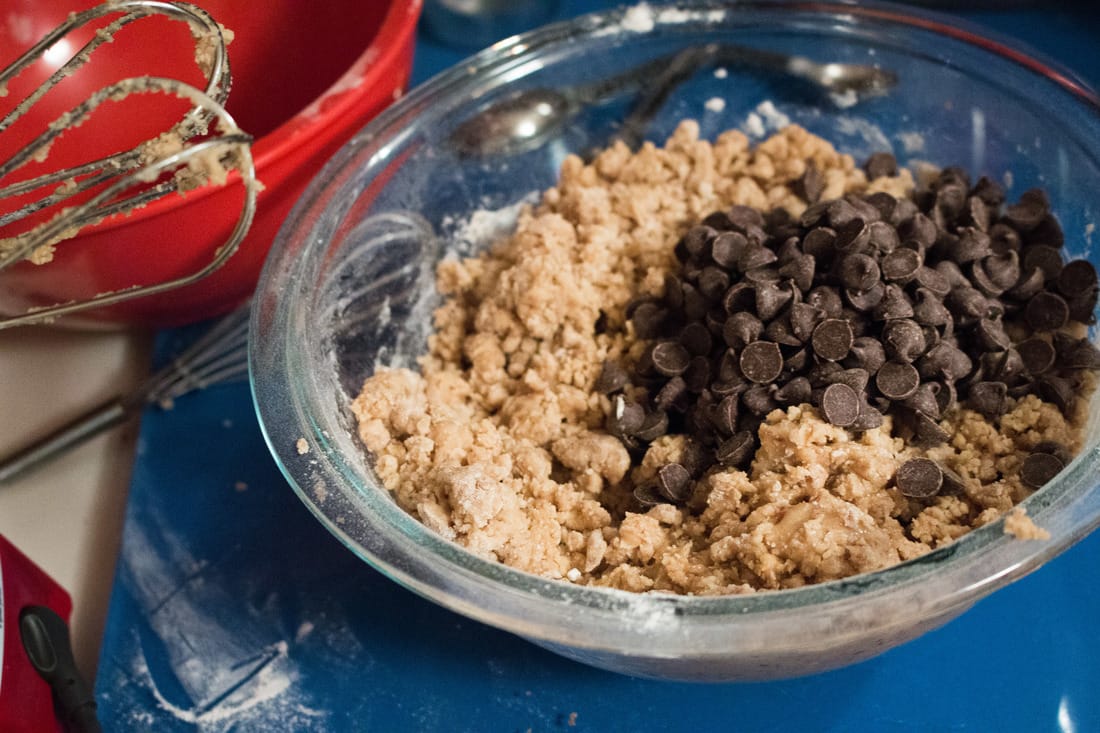
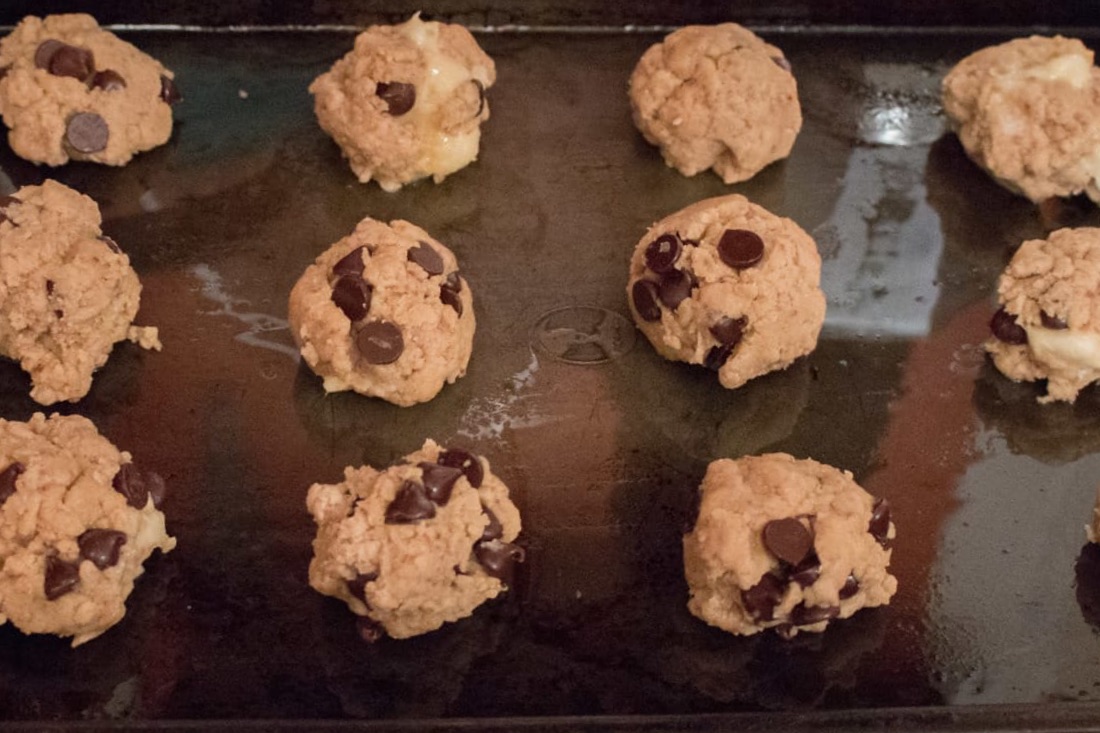
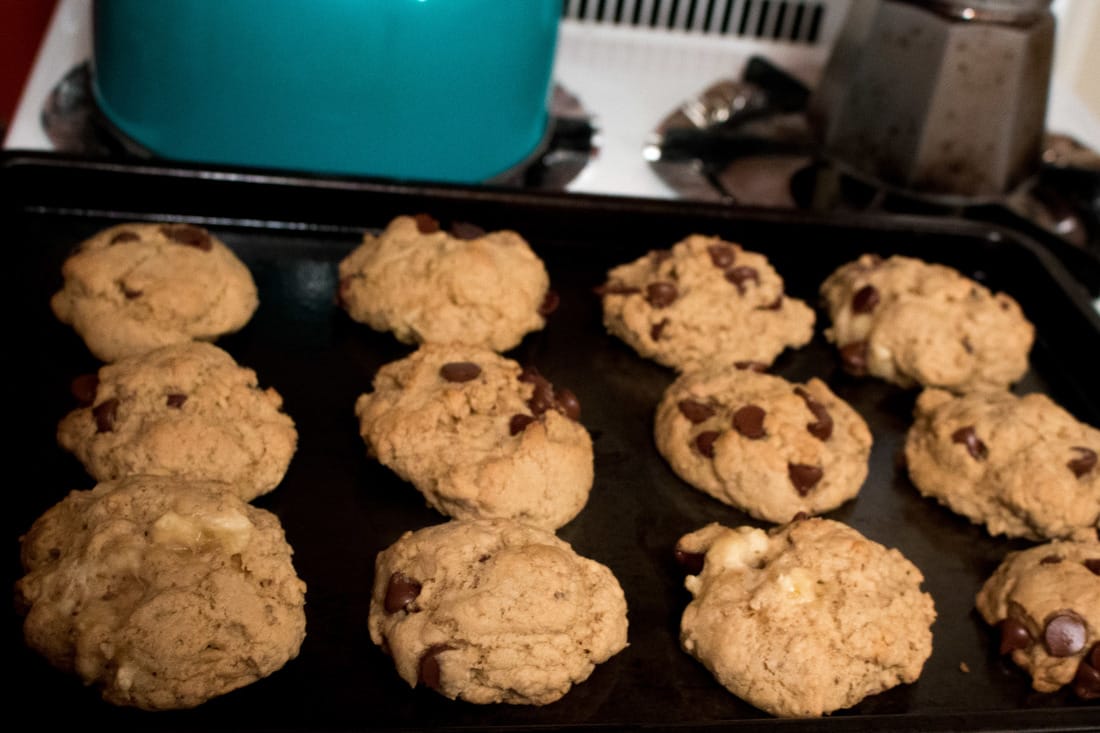
Chocolate chip cookies are a classic. They're acceptable to make year-round, they're easily customizable and they're delicious. This recipe is a vegan twist on a simple cookie.
 
Before we get started, feel free to add add-ons as you see fit for your cookie. If the batter is to liquid-y or sticky, throw in some oatmeal, if it seems a bit dry, put in a dash of milk or blend in a mashed up banana!
 
I'll have a post coming up in a bit with my favorite places to get vegan groceries, but to make things easier for you: vegan chocolate chips are easiest to find if you look for semi-sweet or dark chocolate varieties. I recommend the Trader Joe's semi-sweet chocolate chips or the Kirkland Signature semi-sweet chocolate chips if you're in the proximity of a Costco.
Picture

 Ingredients:
Oil (to grease pan)
2 TBSP flax meal (you can also grind your flax seeds to create this)
6TBSP water
2 1/2 cups flour
1 tsp baking soda
1 tsp salt
3/4 cup granulated sugar
3/4 cup brown sugar
1 cup Earth Balance melted (or other vegan butter substitute)
1 tsp vanilla extract
1 1/4 cup chocolate chips
Optional: banana, chopped nuts, oatmeal

  1. Preheat oven to 375°F and grease cookie pan.
  2. In a small bowl create two flax seed eggs by mixing flax meal with water using a fork. Set aside for at least 5 minutes.
  3. In a medium bowl, mix flour, baking soda and salt.
  4. Using an electric mixer on medium, in a large bowl blend sugar, brown sugar and Earth Balance until just combined.
  5. Continuing to blend, add in flax egg and vanilla extract.
  6. Blend in dry ingredients slowly.
  7. Using a wooden spoon to mix them in, add chocolate chips or other
    add-ins.
  8. Form small balls of dough and set them on the cookie try, making sure to leave some space between them.
  9. Cook for 10 minutes.
  10. Remove from oven and use a spatchula to place cookies on a newspaper or paperbag to harden.
Picture
Picture
Picture
Picture
Picture
0 Comments

Blackberry Frosting

7/30/2016

0 Comments

 
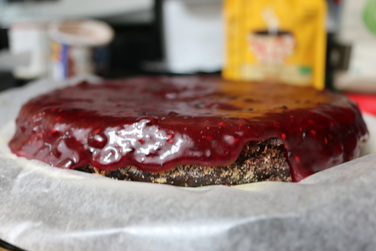
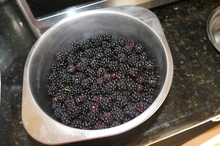
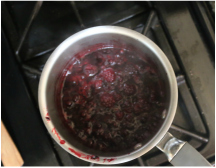
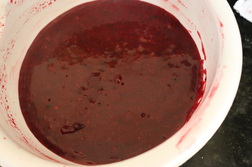
In Washington, August means blackberries. Along the roads, invading backyards and on trail paths, blackberries are the summer weed of choice. Honestly, I don't think there's ever been a time in my life where we've had store-bought blackberries in our fridge. 

This season, we picked too many blackberries too early leaving the taste to be less than desirable (read: sour). So, to sweeten things up a bit, I decided to turn our Thursday-afternoon pickings into frosting! 

This recipe is more jam-like than a buttercream frosting, but trust me, it's absolutely delicious. I used my batch as both the filling and the frosting for a chocolate cake that I'd made earlier in the day.
Picture

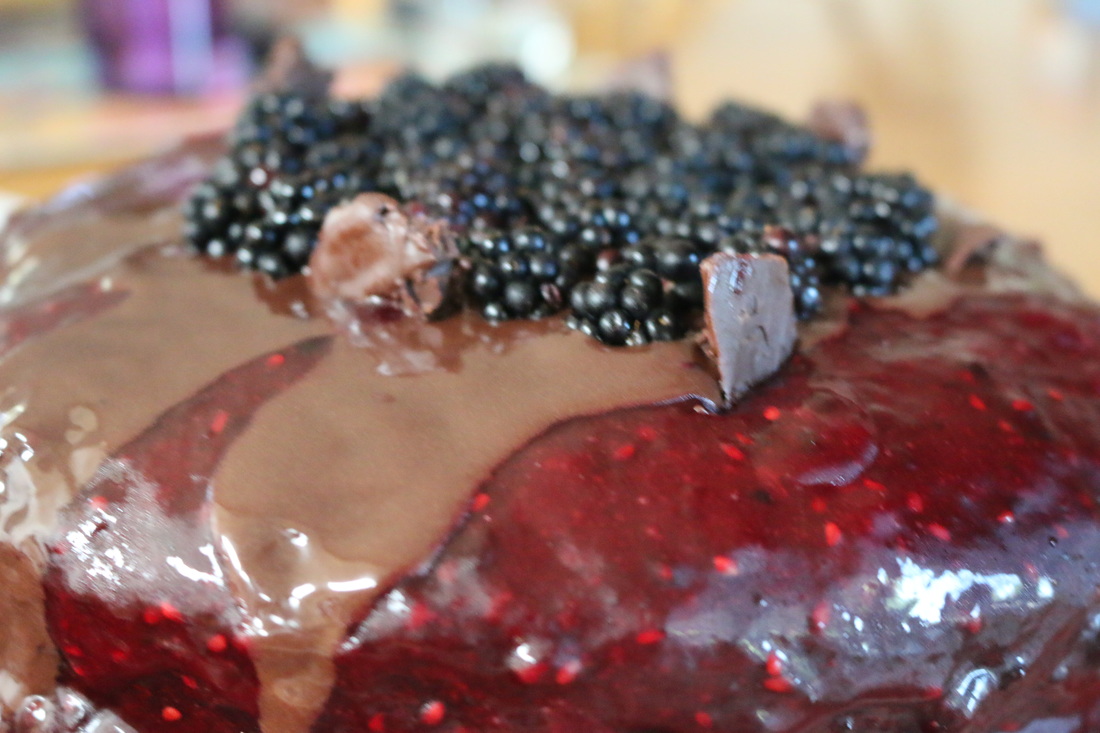
What you'll need:

1 1/2 cup blackberries
2 cups sugar
​1 Tbsp cornstarch
​1 Tbsp lemon juice

small saucepan
blender
electric-hand mixer

  1. Put the blackberries into the saucepan and heat on high heat until the berries start to breakdown and become mostly liquid (about 10 minutes), stirring continuously.
  2. Remove from heat and using the hand mixer, blend on low until the berries become entirely liquid.
  3. Return to medium-low heat for 10 more minutes, or until the mixture thickens.
  4. Remove the saucepan from heat and let it cool. 
  5. Put the sugar and cornstarch in the blender and blend it until it becomes a powder, about a minute.
  6. Slowly pour the newly powdered sugar into the saucepan with the berries, continuously blending with the hand mixer on high. Continue to add the powdered sugar until it becomes gelatinous.
  7. Add the lemon juice to the saucepan and blend for 30 seconds on high. 
  8. Place in the refrigerator for at least 30 minutes, before applying it to your cake.
Picture
Picture
Picture
Picture
Tips:
  • Pour a thick layer in the middle of the bottom cake round and spread it to the outside to cover the edges.
  • Freeze your cake rounds for an hour or so before applying frosting. This helps to prevent the cake from falling apart, as is the tendency for vegan cakes.
  • ​Try replacing the blackberries with another berry of your choice (i.e. raspberries, blueberries)!
  • If you don't want to make your own powdered sugar, you can go out an buy some from the store. Use 4 1/2 cups or so.
  • If using wild berries, make sure you wash them before use; you don't know what chemicals might have been sprayed around them!
  • The frosting can get kinda messy because it's so liquid-y so you might want to place some wax paper below it when frosting.
0 Comments

Frozen Chocolate Banana Bites

7/28/2016

0 Comments

 
​These are my absolute favorite treat on ridiculously hot summer days. They're the perfect mix of cold and chocolatey and super easy to make. If you eat them straight, without putting them back in the freezer, the chocolate forms a shell that makes the frozen banana softer and easier to chew. 

The best part, is it gives you a way to use that super brown banana that's been sitting in your windowsill for the past week (trust me, we all have one). Make sure you don't remove the banana from the freezer until you're ready to cover it in chocolate. This helps it to stay frozen long enough to make the chocolate shell harden.

All you need are some vegan chocolate chips, a banana and a little bit of coconut oil and you're good to go!

What you'll need:
1 banana (the riper the better)
1/2 cup chocolate chips
2 Tbsp coconut oil

  1. Slice your banana into thin rounds, set them on a piece of aluminum foil and place in the freezer for at least 2 hours, or until frozen.
  2. Leaving the frozen banana in the freezer, put the chocolate chips and coconut oil in a microwave-safe bowl.
  3. Microwave the bowl in increments of 20-seconds, stirring between, until the chocolate has melted.
  4. Remove the sheet of tinfoil with the banana on it from the freezer and set it next to the bowl of melted chocolate.
  5. Using a spoon, dunk the banana slices, one by one, in the chocolate and then set them back on the tinfoil
  6. The chocolate shell should form in just a few seconds!


0 Comments

    Author

    Write something about yourself. No need to be fancy, just an overview.

    Archives

    January 2017
    July 2016

    Categories

    All

    RSS Feed

Powered by Create your own unique website with customizable templates.
  • HOME
  • Portfolio
    • Print/Digital
    • TV
  • Resume
  • Blog
  • About